
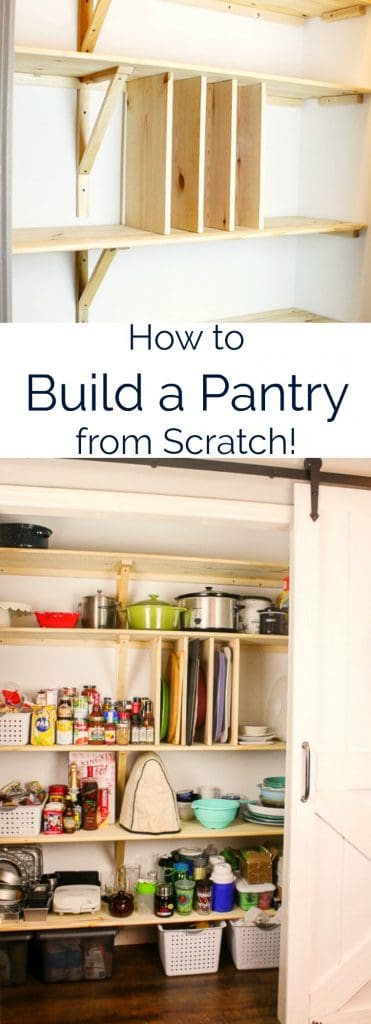
Step-by-Step DIY Pantry Shelves Tutorial to Create a Custom Pantry That Fits Your Needs! How to Build a Pantry in Your Home.
We’ve finished some pretty big projects in the year and half we’ve lived at this house, but this tutorial for a custom kitchen pantry might be my favorite.
Despite what you might think, a DIY pantry is practical and affordable.
The best part about our DIY pantry shelving project (besides the serious upgrade in storage space that comes with our new pantry shelves)?
We finished it in just one weekend. It really could have been done in one day!
So go and build yourself a kitchen pantry. It’s an easy DIY project with outsized results on your quality of life, once you get that oh so sweet extra storage space dialled in for your needs.

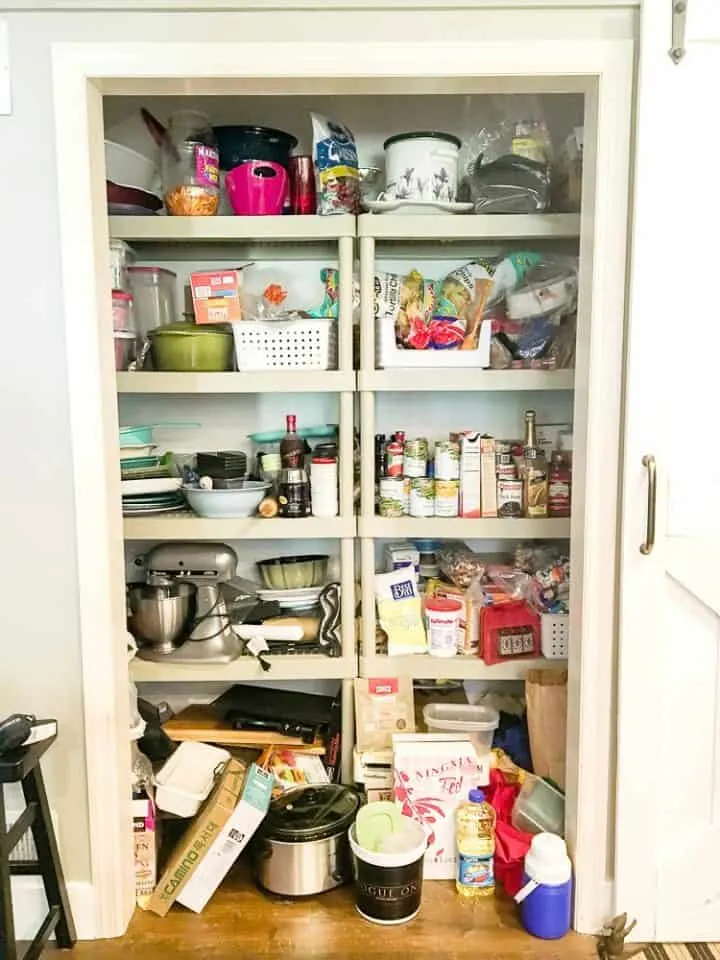
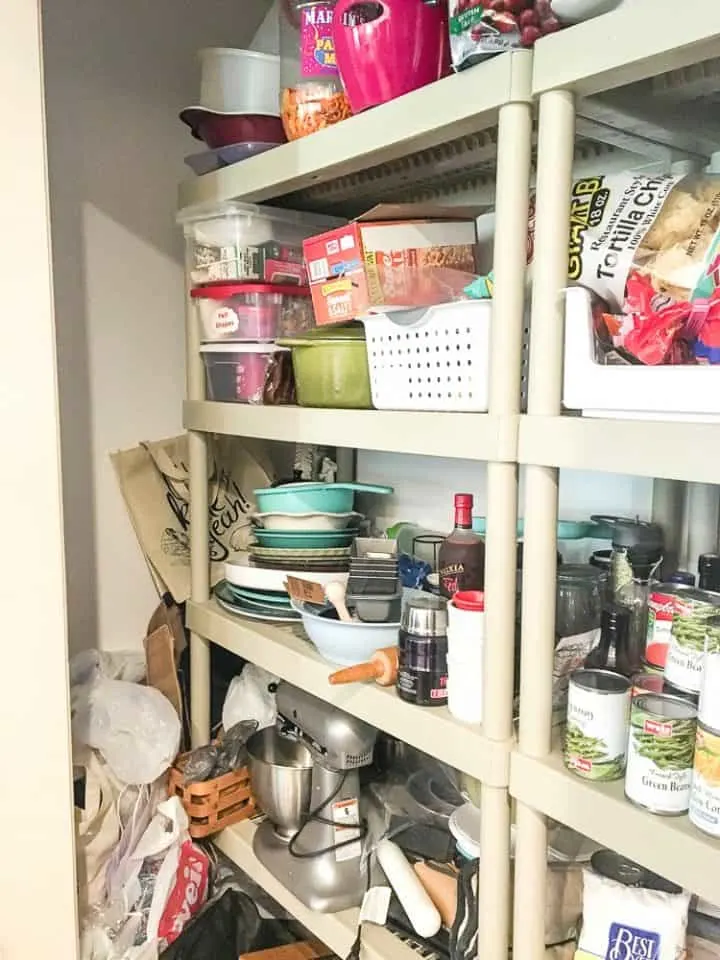
Our Kitchen Pantry Before Shot
When I tell you that we started with a mess, I’m really not exaggerating.
It was a disaster. One falling pile at a time.
(Note: this post was originally written in 2017. I’ve since updated it to provide more detail and help you build your own DIY pantry.)

Sometimes home renovation projects come about as the result of boredom or the desire for more design elements in your home.
Sometimes they actually come about out of necessity.
But sometimes, just sometimes, home renovation projects come about as a way to bring family harmony and unity back into your home.
A well organized kitchen pantry is one such project!
Before building these pantry shelves, our house was a constant refrain of,
“where did you put the cutting board now??”
And…
“If I have to tell you one more time, the green bowl gets stacked inside the other bowls!”
And, yes, there was also some of the classic, disorganized kitchen pantry exclamations of…
“Why did you buy more salad dressing?? We already have 14 bottles in the pantry if somebody would just keep them all in one spot!”
It was a wreck!


When we moved in to the house, we immediately started on the living room renovation. That finished and we jumped to the mudroom renovation, which turned into the office and the bathroom and on and on.
Basically, the pantry was not a priority. So we shoved 2 plastic shelving units in, instead of spending time on proper storage space, and called it good enough.
Except it wasn’t good enough. It wasn’t good at all. And I was feeling frustrated on the regular when someone would put clean dishes away where they didn’t belong.
Time For a Kitchen Pantry Overhaul
We knew we needed a complete kitchen storage overhaul. and that a simple reorganization wouldn’t do.
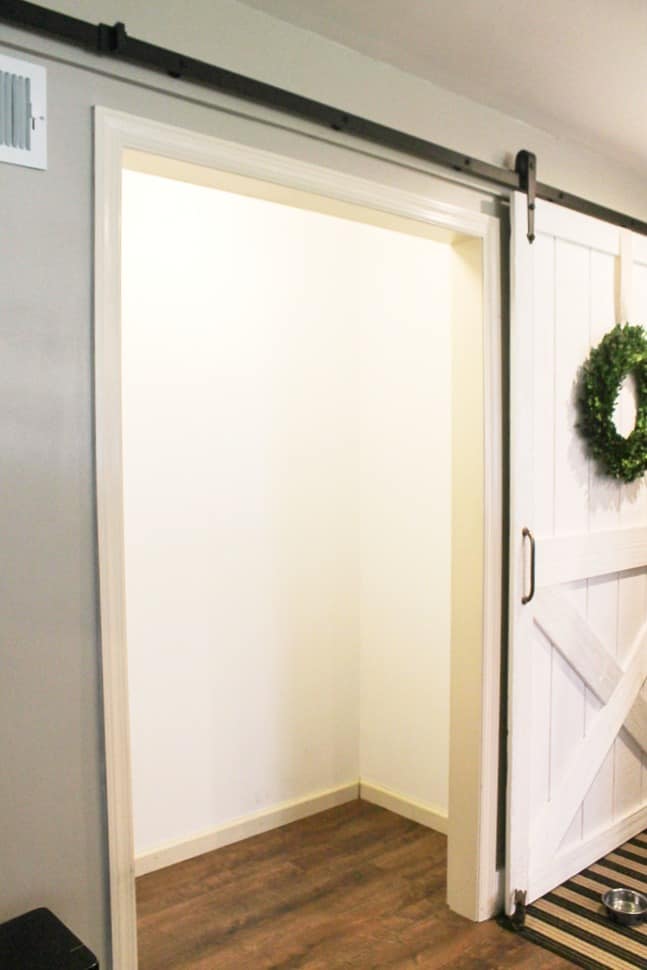
So one weekend, we completely emptied the pantry cabinet. It was time to start from scratch.
Even the plastic shelves got removed and relocated down to the basement.

We ran to Lowe’s and purchased our supplies (right at $100 total!) and got to work.
DIY Pantry Cabinet Note & Caution
Obviously, our measurements were for our specific space, and most likely won’t work for any other house out there.
So I’m not going to bother giving you the specific measurements, because you just need to work with the space you have.
I will give you the steps we used to get the pantry cabinet just right. This includes the supplies we needed and some general guidance that you can easily apply to your own home.
I’ll also give you the overall dimensions of our pantry, because sometimes when you’re planning your layout, it’s nice to get a visual of how large or small it might end up being.
Supplies to Build a DIY Pantry
5 Pine Boards, 1″x 16″x 8′
6 2″x 2″x 8′ boards
1 1″ x 2″ x 8′ board
Router (optional)
How to Build a DIY Kitchen Pantry and Pantry Shelves
Plan Your Pantry Storage and Space
Before nailing any permanent pantry storage into place, it’s worth thinking about what kind of kitchen storage you need, and whether there’s any specific needs you should account for.
A few tips:
- Measure the tallest items you’ll store in the kitchen pantry, and make sure you have enough clearance when planning out the shelf spacing. For example, my Kitchenaid Mixer needed a lot of space. If you plan to keep other small appliances on the shelves, be sure to consider their height!
- Consider the best way to store awkward items. I was dead set on having vertical cookie sheet and cutting board dividers, so again I had to determine the height based on the tallest item I wanted to stand up (my IKEA cutting board).
- If you plan to use any storage bins, etc, to organize specific items such as canned goods, really small appliances like hand mixers, etc., then buy the bins in advance and account for them when planning the shelf spacing. I like a mix of bins and open shelves for maximum flexibility.
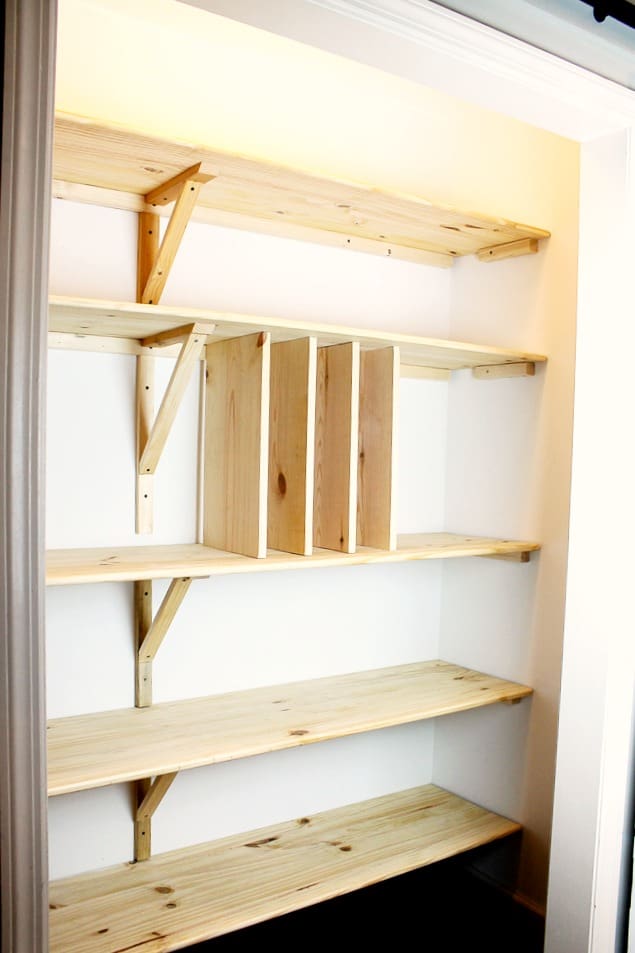
Mark Out Your Pantry Shelves
Once you’ve figured out the right shelf heights, make your pencil marks on the wall so you don’t have to measure them again!
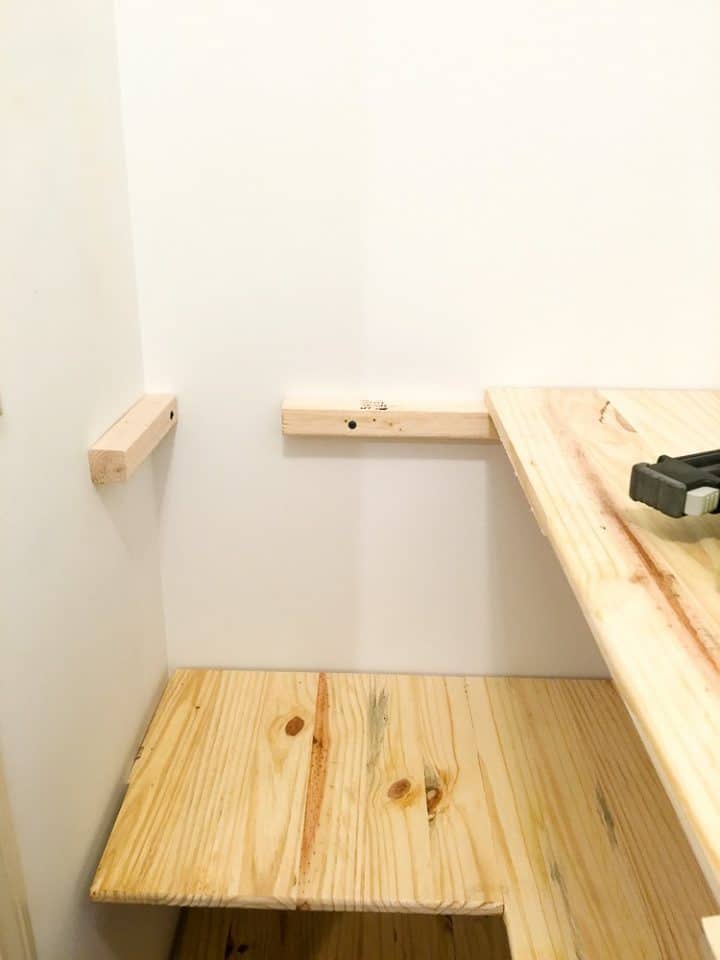
Then cut your 2″x 2″ into lengths to line the back wall of the pantry. Using a level and a stud finder, screw them straight into the studs using the 3″ screws.
At the same time, cut some 2″ x 2″ board into 8″ sections for the side supports for the shelves.
Make them level with the back supports and screw right into the studs


Cut and Finish the Pantry Shelves
Next it’s time to cut your shelves out of the 1″ x 16″ pine boards.
We were able to cut a length to span the entire back of our pantry wall, and the excess piece that was cut off was nearly the perfect fit for our side shelves on the one side.
This was lucky, and just so happened because of our specific kitchen pantry dimensions.
After we cut our shelves, we used a router with a rounding bit to round the front edges of the pantry shelves. This is completely optional, but really gave it a finished look, and I highly recommend it.


Install the Shelves into Your Kitchen Pantry
Now it’s time to actually install the shelves!
Starting with your bottom shelf, place it on the back and side brackets and nail into those supports using a nail gun. Work your way up the pantry, securing each of the back shelves.
(side note: I know it looks like we’ve already added the wood brackets by this step, but I promise we didn’t add them till later. I just forgot to get pictures along the way, so I had my husband pretend to hold the nail gun at the end so I could show you exactly where we nailed from.)


Then go back and add your side shelves by nailing them to the side support and back support.

Add Some Supports to Reinforce the Pantry Shelves
To give them additional support on the front right corner, we added L-brackets underneath. On the very top shelf, we added it on top so it wouldn’t be as visible.


To add extra support over the long-run, we also built some DIY wooden brackets to support the center of the shelves.
We used the 1″ x 2″ boards to build these. The measurements were different for each shelf depending on the height of it, but the top and side pieces are roughly 12″ each.
(Of course, the one I took a picture of has the back piece that’s extra long. It’s fine. That really doesn’t affect anything, so don’t be too concerned with that length.)


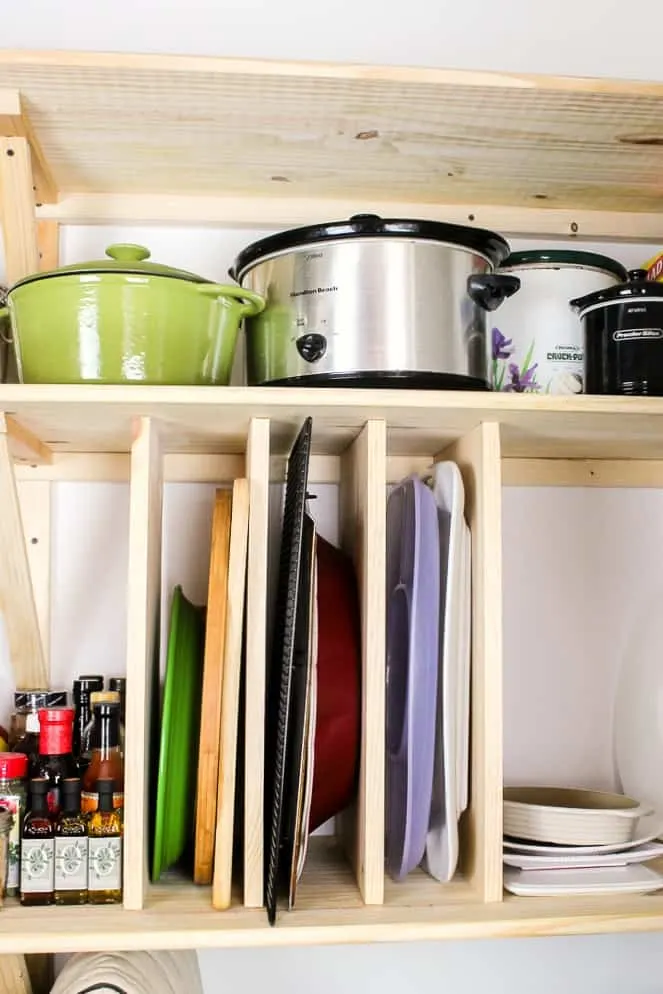
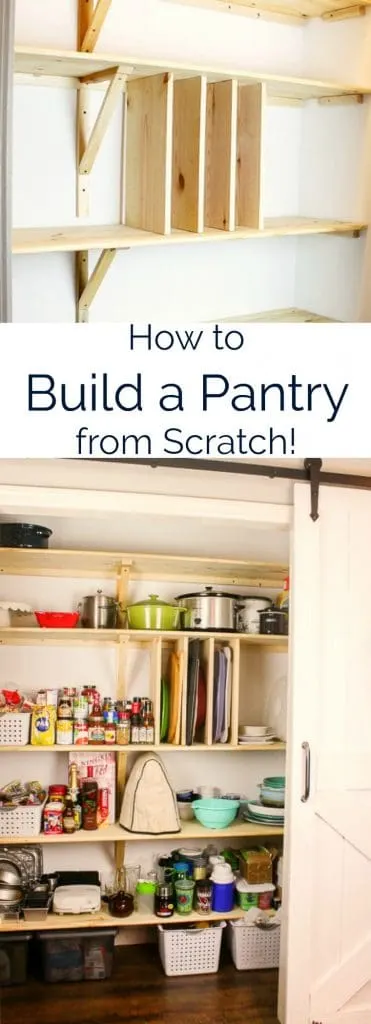
How to Build a DIY Cookie Sheet Divider for Your Kitchen Pantry / Pantry Cabinets
This is optional, but I think it’s a great feature, and very practical for storing cookie sheets, cutting boards, platters, etc.
We used a 1″ x 12″, cut to the exact height between the shelves.
We then nailed them in from the top and from the bottom using a nail gun, spaced 4.25″ apart.

Exact Measurements
Here is the breakdown of spacing we left between our shelves.
The overall dimension of our finished pantry is 80.5″ x 31″.
I don’t expect these exact measurements will work for your kitchen pantry. You’ll need to adjust based on whether its a walk in pantry, specific sizes, and what you want to store, etc.


Final Thoughts About My Pantry Cabinet & Kitchen Storage Makeover
I honestly can’t even describe how nice this is to have a finished, organized pantry! It’s hard to believe that it used to look like this:

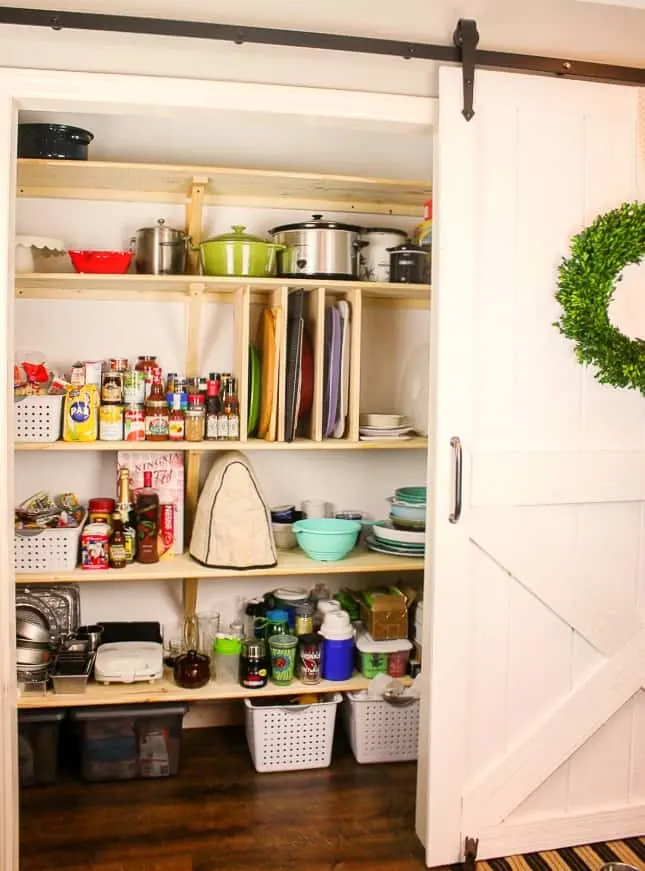
And now I get to stare at this beauty!


I HIGHLY recommend adding in slots for cookie sheets and platters into your pantry cabinet!
It was such a pain before having to lift everything up to get that one platter that was always on the bottom. This is the stuff that dreams are made of!

And it’s crazy to me that even though we went from 5 shelves before to 5 shelves now… we have SO much more room! Every single thing I took out went right back in, but there is so much extra room now! It’s amazing what a little organizing can do when it comes to space!


If you’re struggling with a disorganized pantry, be sure to pin this post so you can get to work the next time you have a free afternoon! It is well worth it!!
Tammy
Tuesday 20th of April 2021
Awesome job! Thank you for the step by step. (also... I literally squeed out loud when I saw the NingXia Red box!!!)
Joy
Sunday 22nd of March 2020
looks nice. instead of a bracket on the one shelf could you have just centered the cookie sheet dividers and they would have provided support. also to the left of them you could add a narrower shelf between the existing ones. not even attached to wall. just on legs so that it could be removed. you would be able to use the height since it looks like mainly shorter items are stored there.
Natalie
Monday 27th of April 2020
Hi Joy! Those area great options if they work for the space in your pantry. For ours, I wanted the consistent look of brackets going straight down the middle of all the shelves. I also use that bracket to lean cookie sheets against so I still use that as an "opening" to store the sheets. We did discuss adding a smaller shelf to have two levels for canned goods but decided against it because we didn't want the extra weight. It's always an option down the road if I need more space!
20 DIY Pantry Makeovers With Organizing Tips And Storage Ideas Fox Hollow Cottage
Friday 6th of March 2020
[…] How To Build A Pantry With A Sliding Barn Door [click here] […]