
For many years, my daughter and I hosted a Gingerbread House Decorating Party with some of her friends every Christmas season. We loved those memories but wanted to switch it up a little this year and have a Cookie Decorating Party instead and knew our Cricut would be perfect for it!


Since I had this idea tucked away in my head since last year, I jumped at the chance to partner with Cricut to bring it to life. Sometimes I need that little extra push (please tell me you know what I mean)!
I hopped onto my Cricut Design Space to take a look at some of the Make It Now Projects and Designs to decide what direction I wanted to head in. I knew I wanted it to be fun and lighthearted with whimsical colors. This was a cookie decorating party for teens, so I didn’t want it to be too childish for them.

Supplies for Christmas Cookie Decorating Party
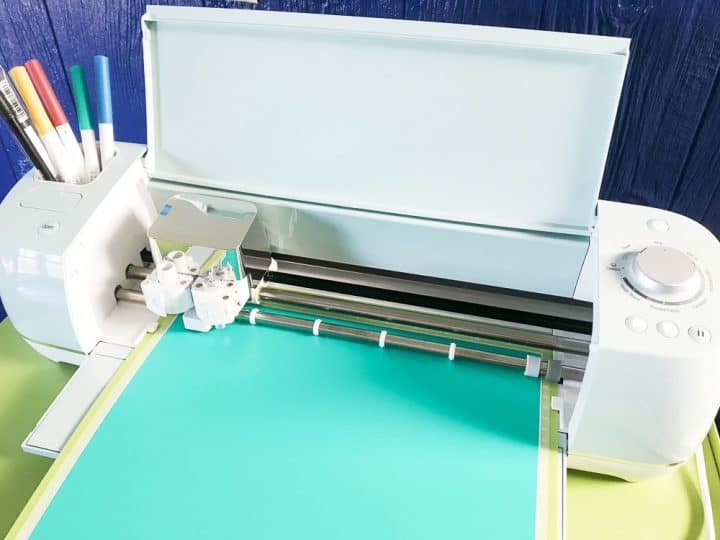
Cricut Explore Air 2
Cricut Access
Basic Vinyl (I used Berry and Caribbean)
Iron-On Lite Vinyl
Cricut Transfer Tape
Kraft Paper
Tablecloth
Take-out containers
Plastic Cups
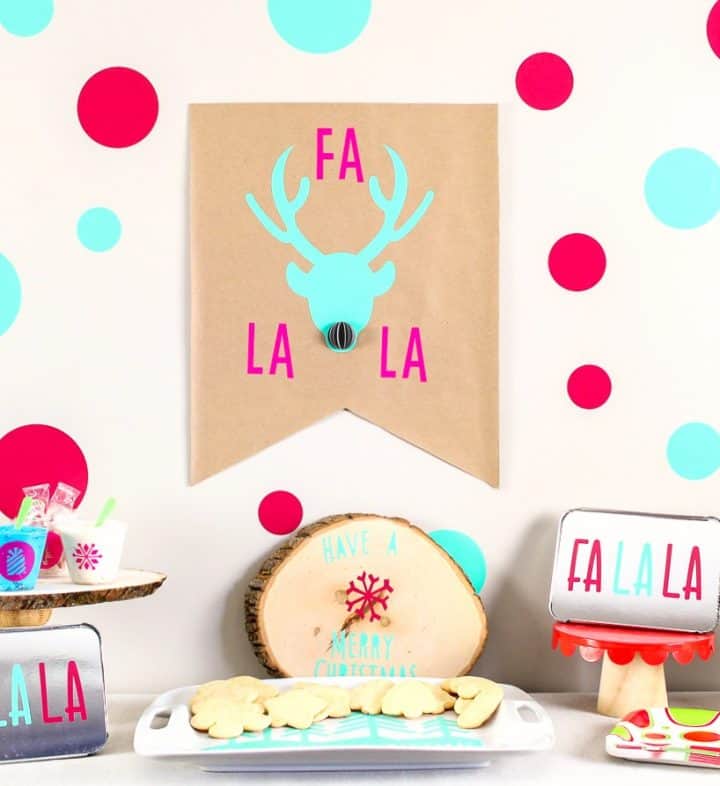
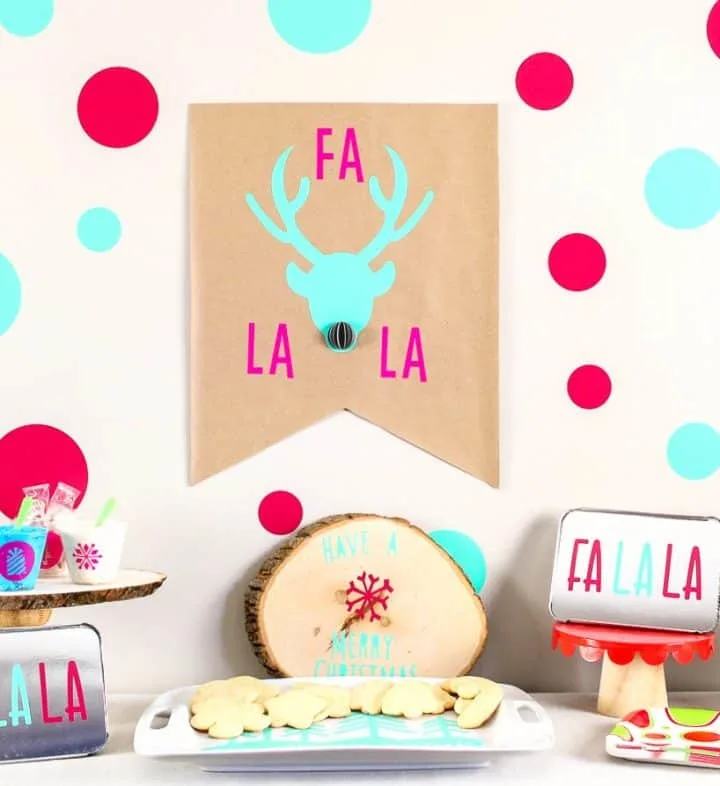
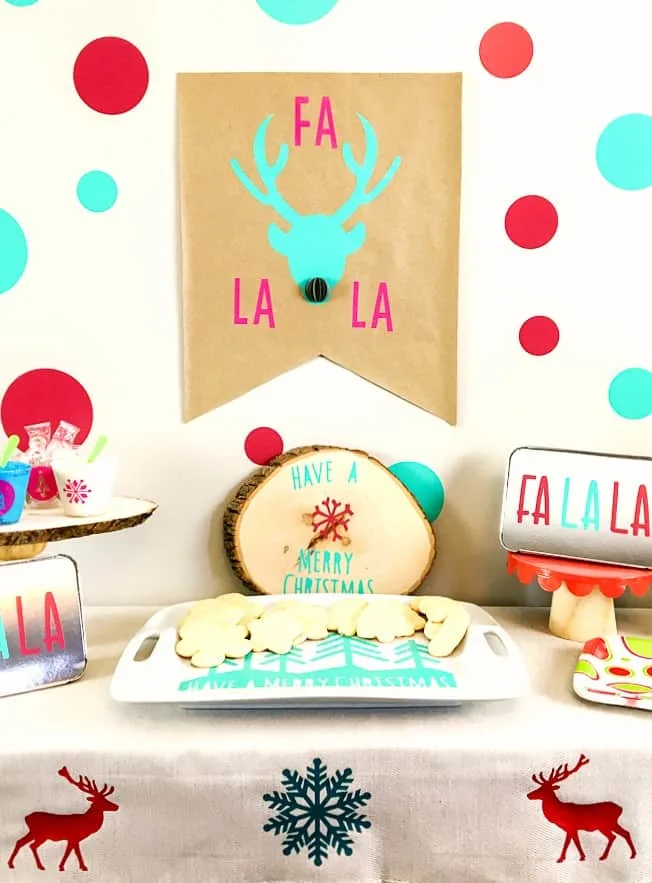
As soon as I saw this Fa La La Wall Art, I knew this was the direction I wanted to head in! I had a roll of kraft paper from the dollar store that I cut into a pennant shape. Then I resized the artwork in Design Space and sent it to the Cricut.


I also cut out some basic circle shapes in Design Space to add a confetti-like look to the walls around the banner.
I love the combination of the Berry vinyl and Caribbean vinyl! It’s fun and festive and will remove from the walls easily once the party is over.
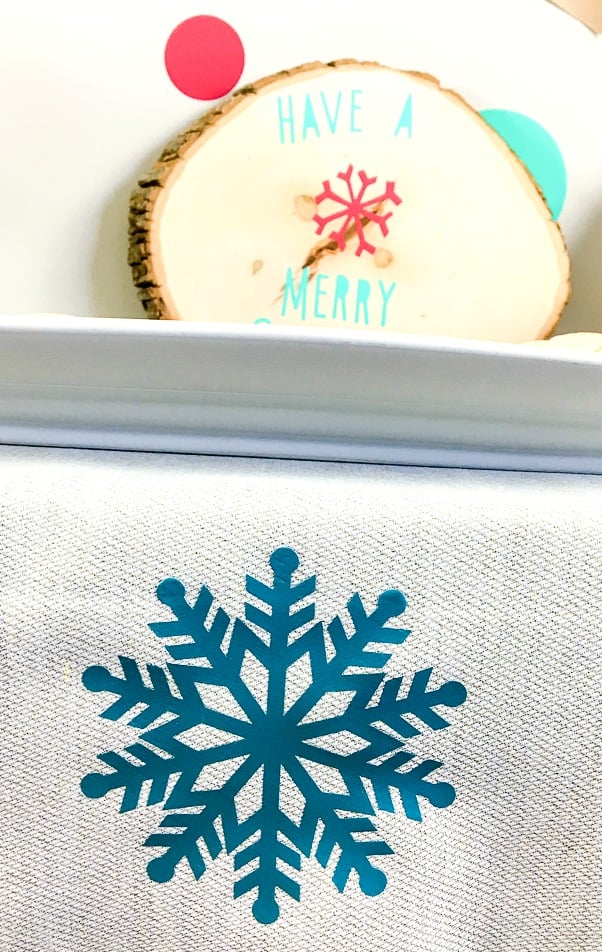
I moved over to the Iron-On Lite vinyl to make the “tablecloth”. I use that term loosely, because it’s just a piece of dropcloth, but with the Christmas-y shapes it looks like it’s ready for a party!
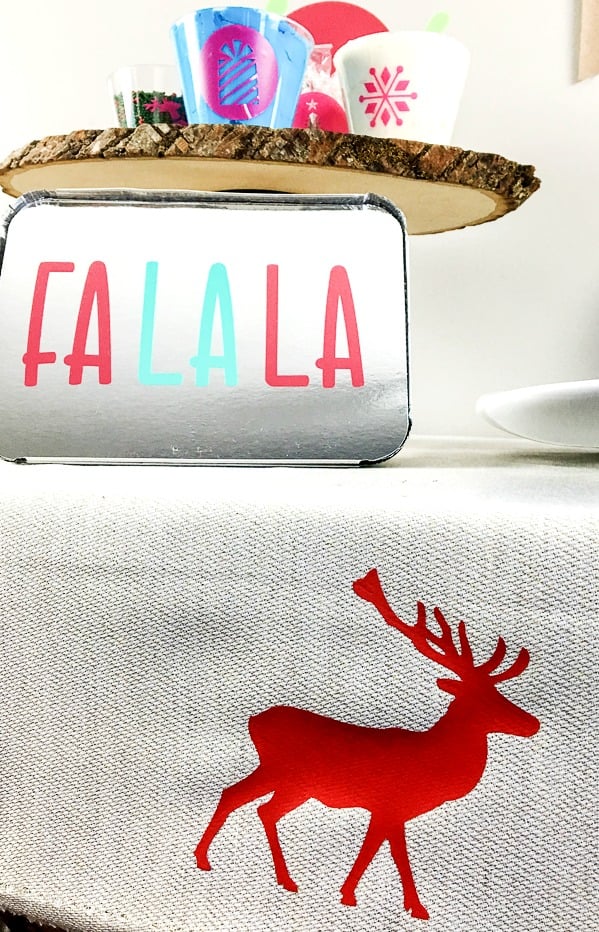

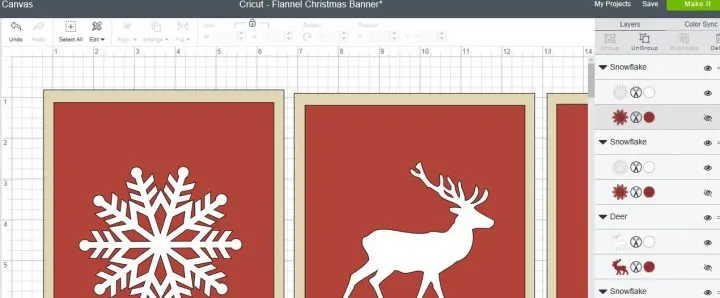
The shapes I used for the tablecloth, are actually a pennant banner in Design Space. I just deleted all the backgrounds until I was left with just the snowflake and reindeer silhouettes.

To delete backgrounds, just go to the right sidebar and click on the layer that you want to remove. In the below screenshot, you can see that I highlighted the red snowflake layer by clicking on it. Then just go above that right sidebar and click on the trashcan. For the tablecloth, I deleted every layer except for the basic shapes.

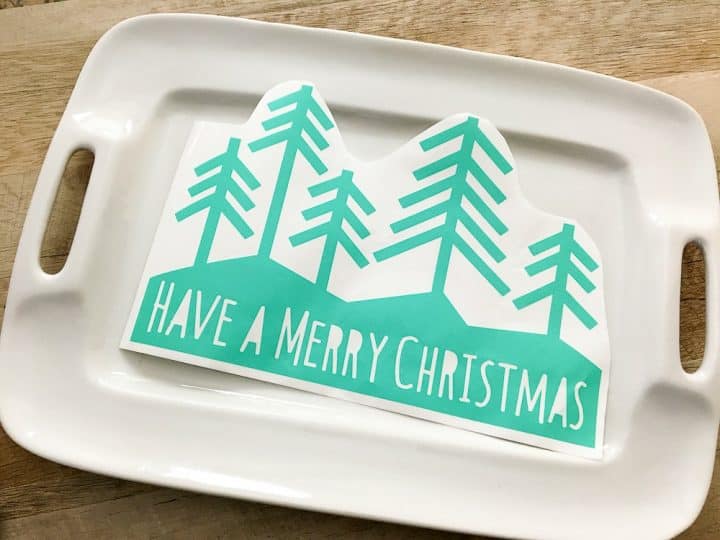
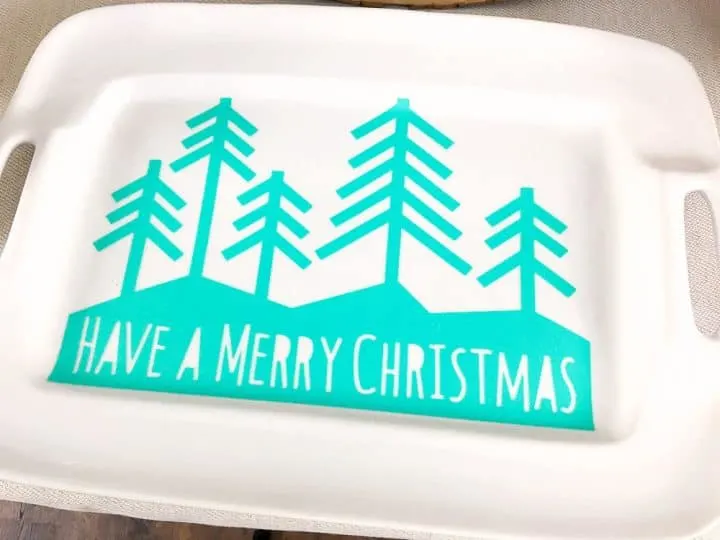
I used the same technique to make the cookie tray. I found this Make It Now Project for a set of holiday cards. I really liked the silhouette of the trees with the words at the bottom, so I just deleted layers until I was left with just that image. Then I resized it to fit a specific tray that I had.


I loved the way it turned out so much, that I used the letters that I (carefully!) weeded out and used them on a wood slice! Then I just cut a small snowflake for the center of the wood slice. Two projects for one!
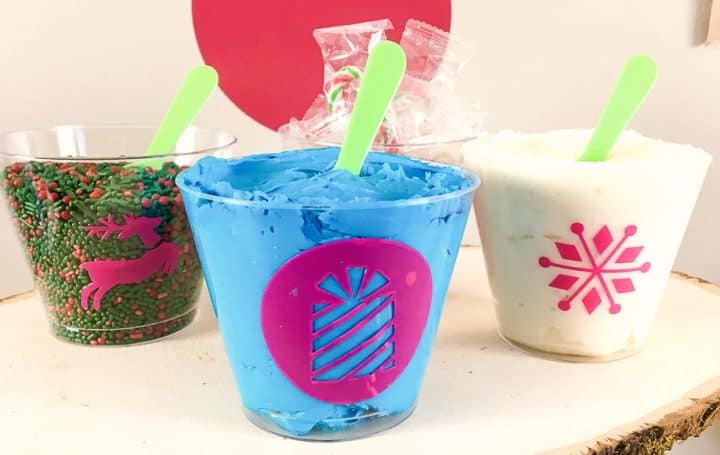
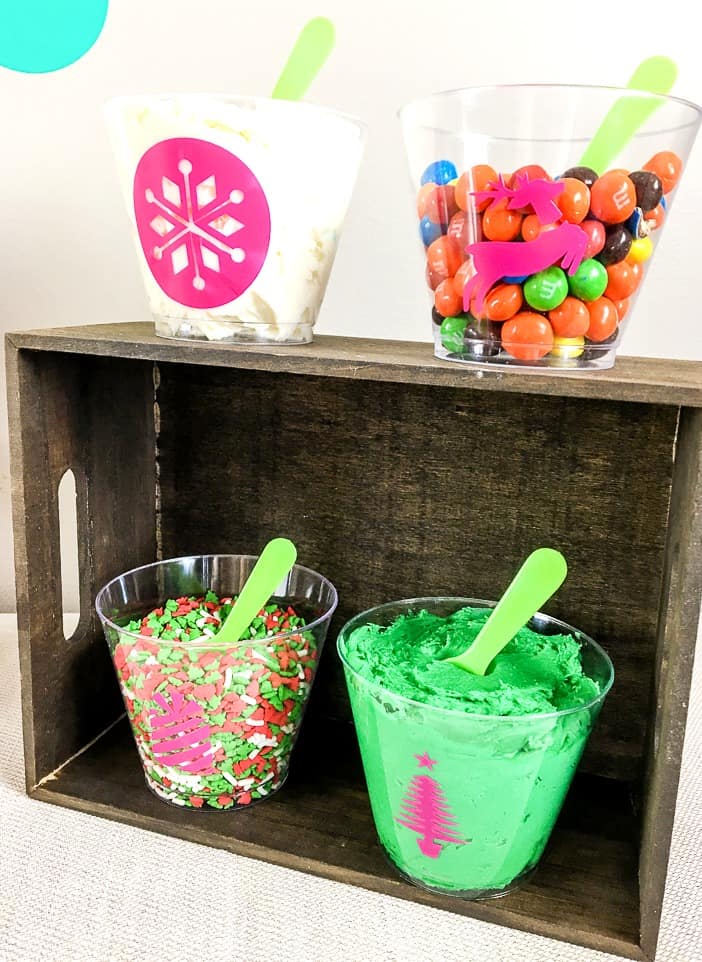
For the frosting and sprinkles cups, I started with a blank canvas and clicked on Images in the right sidebar. Then I went to the drop-down menu for Categories and selected Christmas. From there, just select the images you like. I found these plastic cups at our dollar store and re-sized my images to 2.25″.


One of my favorite parts of our Cookie Decorating table are the containers I found for the kids to take their decorated cookies home in! I grabbed these take-out containers from our dollar store (you can’t beat 3/$1!). These are the perfect size for about 6-10 cookies depending on how large you make your cookies. They just needed a little Cricut magic to come to life!

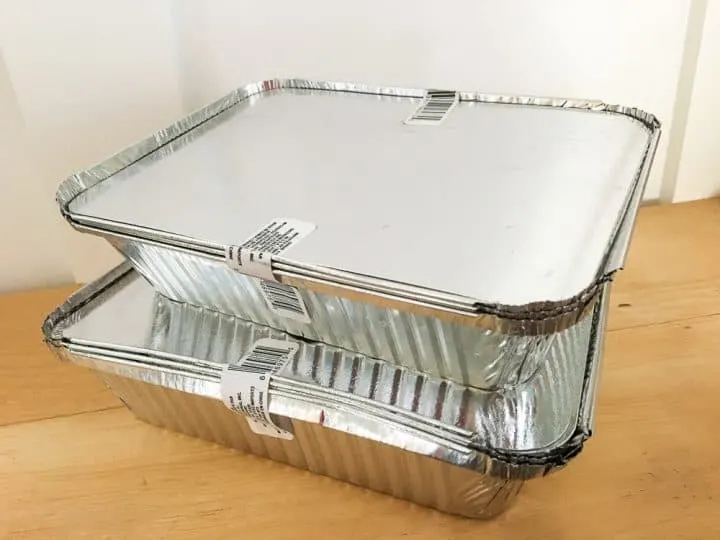
I found this Make It Now Project for a set of 3 pillows that said Fa La La. I loved them! The quirky font gets all the heart eyes from me! This was literally as simple as opening up the project, clicking “customize”, resizing the letters and then sending it to the Cricut Air Explore! Then I just used transfer tape to transfer them to the lids of the containers.


Our entire party came together from images and projects that were already created for me in Design Space! I literally didn’t have to spend any time designing at all. The most I did was change the dimensions in the upper tool bar. So easy and it looks so festive and fun!

And as if that isn’t fun enough, now you get the chance to enter to win a Cricut of your own! Follow the directions below and good luck!
a Rafflecopter giveaway


This is a sponsored conversation written by me on behalf of Cricut. The opinions and text are all mine.